

- Pokemon ROWE Guide – Explore Hoenn as You Wish! - October 27, 2023
- Pokemon Parallax Guide – James Bond Meets Pokémon - September 10, 2023
- The New Squirtle Funko POP Is Making A Splash - August 30, 2023
Many Pokémon fangames focus on the battles: Some try to develop a whole new battle system, while others insert new Pokémon and new types and change what we know. But, battling in Pokémon isn’t all. There’s a lot of people that love to catch them all! That’s why Pokémon Ultra Violet exists.
Pokémon Ultra Violet is a ROM hack that doesn’t bring anything outstanding to the table; instead, it pleases the first-ever feel that Pokémon lovers have felt while playing: the opportunity to complete a whole Pokédex without needing to trade Pokémon with other people.
This game has the same adventure that Pokémon Fire Red has, but with a small tweak; it will let us catch every Pokémon from Kanto, Johto, and Hoenn. So, Pokémon Ultra Violet is designed for those who love Pokémon differently; as a completionist.
Essential Things to Know in Pokémon Ultra Violet

WARNING! You may find some spoilers here! If you want to enjoy the full adventure on your own, skip this!
The Real Objective in Pokémon Ultra Violet
A great thing about Pokémon Ultra Violet is that the game doesn’t change any in-game mechanics and inserts difficult battles; It will be enough with what you know about Pokémon. This game is slightly easier than the original Fire Red since you can have access to powerful Pokémon (like Mew) before even getting half the badges; you can build a balanced team here.
The game is focused more on exploring new things in the region and completing the whole Pokédex, so, this time, your dream will not be being the strongest Pokémon trainer; instead, your dream will be being the best Pokémon researcher.
Starting the Game
As we said before, Pokémon Ultra Violet is the same adventure as Pokémon Fire Red but with some little tweaks that we will be seeing throughout the guide. So, Ultra Violet starts exactly like Fire Red, with you in your room in Pallet Town, about to receive your first Pokémon.
After getting to Professor Oak’s laboratory, you can choose between one of the three starters
(Bulbasaur, Squirtle, or Charmander) or catch a special one in the laboratory’s research facilities. Here, you can find:
- Pichu
- Machop
- Ralts
- Gastly
- Trapinch
- Houndour
- Spheal
- Larvitar
- Dratini

Shinyzers
After getting your starter, you’ll have to battle against your rival and then start your adventure! After the battle, you’ll be able to get to the first Route, and for the first time, we will find something that will repeat a lot in several places on the map; shinyzers.
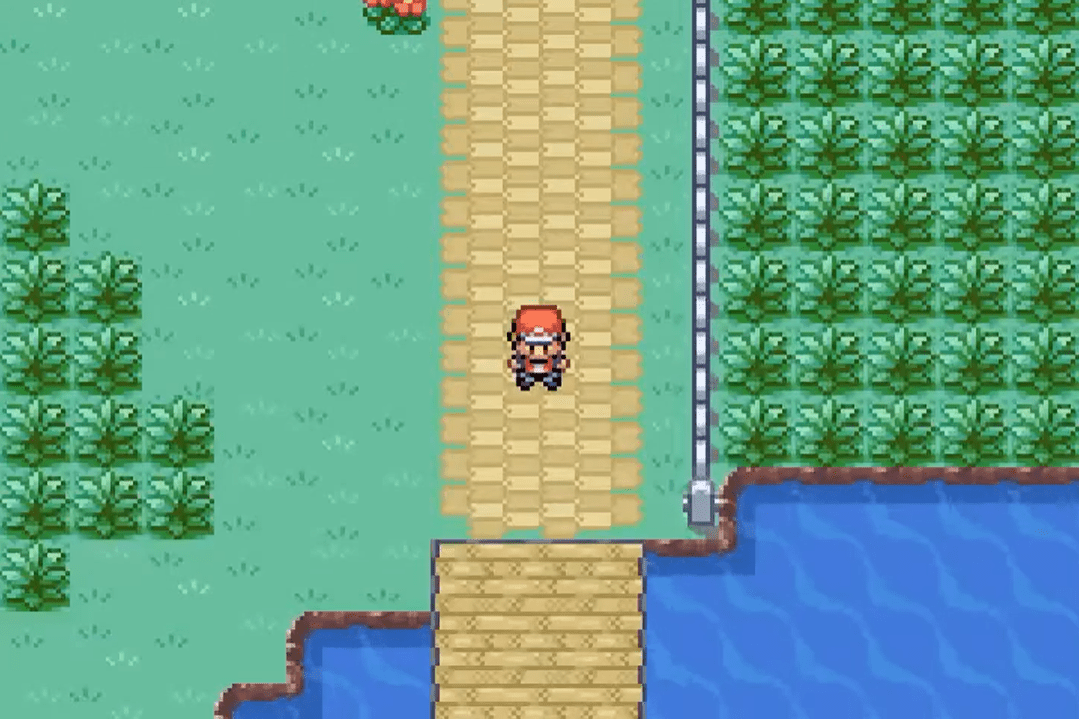
Shinyzers are random spots on the map that, if you step on them, the next wild Pokémon you’ll see will be shiny. In this case, you can find the first-ever Shinyzer in the group of tall grass after passing the Route Sign. The exact spot is in the upper left corner of the group of tall grass. Here, you’ll only find Rattatas and Pidgeys, but don’t worry, there will be more of them with interesting Pokémon!
Shinyzers have a cool trick; if you step on one of them and use a repel, you can travel wherever you want to get any shiny Pokémon in the game. This trick also works with legendaries too! At this moment, you can’t catch any Pokémon yet; you have to deliver Oak’s package, and then, you’ll be able to continue. But consider this spot if you will have a Flying-type like Pidgey; they are always useful in adventures.
The First few Routes
The first few Routes are equal to Fire Red, so here’s a quick resume of it: After passing through Route 1, you’ll get to Viridian City. Next, go to the store, take the package in the PokéMart and leave. Next, go to Oak’s Lab, deliver the package, and head to Viridian once again. If you want to complete the Pokédex, remember to catch any new Pokémon you see. After that, you can train on Route 22 and fight with your rival or continue to Route 2 and get to the Viridian Forest.
Viridian Forest is also equal to the original Fire Red, but you’ll find a Shinyzer here, so you can have a Shiny Pikachu! You’ll find the spot if you head to the right (where the signs are) once you get into the forest. Continue the path until you get to a sign next to some flowers. Then, go completely to the upper right corner where the trees are. There’s the Shinyzer!

Another important thing in case you are going for a Pikachu, there’s a 50% possibility of finding one with a Light Ball, which doubles Pikachu’s Special Attack. After getting out of Viridian Forest, exactly in Route 2, you’ll find a Legendary Dog laying there, waiting for you. But, unfortunately, you’ll not be able to catch it until the Post-Game.
Pewter City
Here you will find your first Gym Challenge, and it is against Brock, a Rock-type trainer. He has an Onix (Level 13) and a Geodude (Level 12). Water or Grass-types will work against him.
After this, and doing all you need to do in this city, go to Route 3. This is the only place where you can have a Jigglypuff, so catch one. Also, here’s another Shinyzer; you’ll get there going completely to the right and getting into the group of tall grass in the bottom. The Shinyzer spot is exactly in the bottom left patch.
You’ll pass Route 4 and then Mt. Moon; prepare yourself from the Zubats! The only new thing on Mt. Moon is that you can have both fossils from the super-nerd. You’ll be able to revive them later on 4-Points Isle.
Basically, your next task is to get to Cerulean City.
Cerulean City; Finding Mew

Here you’ll find your next Gym Badge, this time against Misty; she has a Staryu (Level 18) and a Starmie (Level 21). But, again, Grass-types can do the work! Also, this is the only place where you can find Jynx, exactly by trading it with a Polywhirl in the house at the Northeast corner.
There’s not much to do here, so you have to head to Route 24, where you’ll be able to get to Bill’s house after the Nugget Bridge. His house is a cabin at the right end of the Route.
To your surprise, you’ll discover Bill has discovered how to transform people into Pokémon. He will ask you for help, and after that, he will let you enter his machine, which will transport you to a mysterious place. Unfortunately, there’s not much here, except for the only Mew you’ll find in the game. It is at Level 7, so save the game before trying to get it.
After catching Mew, it is time to continue with your adventure! The Routes between Cerulean and Vermillion City are pretty straightforward, and there are no new things there.
Vermillion City and the next routes
This is the part when you get into S.S Anne and get the Bike by listening to the Pokémon Fan Club President. Then, explore the city and head to the S.S Anne!
In the house at the center of the city, you’ll find the only Farfetch’d in the game, but you’ll need to trade a Spearow to get it.
S.S Anne doesn’t have any change either, so continue with your adventure as usual!
The only interesting thing in Route 11 is the only Mr. Mime available in the game; you have to trade it for an Abra to get it.
Exploring Route 11 will not take you a lot of time, and you’ll need to head back to Vermillion, this time to fight against Lt. Surge, an Electric-type trainer with Pikachu (Level 18) Raichu (Level 24), and Voltorb (Level 21). Use the TM Dig you got after exploring Cerulean, and you’ll win this battle!
To continue with the game, you have to get to the nearest house to the Docks. There, you’ll get a quest with a letter that will send you to a distant island: 4-Points Isle.
4-Points Isle
Welcome to the new part of the game and where the most interesting things will happen; 4-Points Isle. Here, the battles are completely illegal due to the religious culture of the Island. Here, you’ll find all the Gen 3 Pokémon.

The first thing you have to do is get to the house at the left of the docks. Here, a lady will give you the blue flute to thank you for traveling to the Island and give her the letter. You’ll not be able to get to the city; then, you have to trespass the guard by going through a hole in the fence next to the house.
Your first time in the town can be a bit boring, but there are some things you can do, like getting all the new Pokémon from here and exploring the Dread Mountain, where you can find Rayquaza resting at the top. Unfortunately, you aren’t strong enough to catch it as it is at level 70, but you’ll visit the place several times; don’t worry.
The next thing you have to do is getting back to Vermillion and continue with the Gym Challenge!
Heading to Celadon City
Route 9 is our next destination. There are no new things here. Rock Tunnel’s only change is three Shinyzer spots in between two walls. To get here, you have to enter the Tunnel, then going up and to the right until you get to a Rock wall. You’ll see some rocks on the floor; between the wall and the rocks, you’ll find the Shinyzer spots.
Explore the whole cave since there will be a guy on the second floor who will teach one of your Pokémon Rockslides. Lavender Town and the following Routes are easy to figure out, and there aren’t any changes, so you can continue freely!
Celadon City is a massive place. The first thing you need to do here is going to the shopping mall and supply your backpack there. After doing it, you can get an Eevee by going through the back of the Poké Center and getting into a door in the back of a building. We recommend buying many Repels and Ultra Balls as you’ll need them later on in the game.
Go and beat Erika, the Grass-type Gym Leader. She has Tangela (Level 24), Victreebel (Level 29), and a Vileplume (Level 29). Fire-types will help you a lot.
Lastly, you have to get into the Rocket Hideout, as usual. Your quest here is to get the Silph Scope. Now, back to Lavender Town! The Pokémon Tower is the same as the original game; you have to rescue Mr. Fuji, and he will give you the Poké Flute. Here’s the only place where you can find a Cubone.
Now, go back to Celadon, get the tea from the old lady in the mansion, and head to the following Route to get to Saffron City.
Saffron City
The only change here is the unofficial Fighting-type Gym, where you can get both Hitmonlee and Hitmonchan after completing the challenge. Before doing the next Gym, you have to get into Silph Co. Again, there are no changes here. The only cool thing is that you’ll get a Lapras when you fight against your rival; he’s easy to find since he’s on your way.
Getting rid of the Rocket Team Grunts (and getting the Master Ball) will unlock the Gym, where Sabrina is waiting for you with Kadabra and Venomoth (Level 38), Mr. Mime (Level 37), and Alakazam (Level 43). Finally, after this long quest, we have to head back to the 4-Points Isle.
4-Points Isle; Second Visit and the Catacombs

You have to infiltrate into the town once again. But, this time, you’ll be able to buy a house there! This means that you are now a part of the residents of the Isle, and now you have access to the Catacombs.
The Catacombs are composed of a big maze. Before exploring, we recommend using the repels you bought (obviously, after catching all the new Pokémon you can find there). However, solving the maze itself is pretty straightforward too.
After getting through the maze, you’ll be in a room with a statue on it. Talk with the statue, and you’ll get a battle against one of the Regis. To unlock the last two, you have to solve the maze by taking a different route, so it is better to write what you are doing on paper while solving the maze. Also, you have only an opportunity to catch them. So save the game before getting into the battle!

That’s all you can do this time; it’s time to get back to Kanto. Head to the West of Celadon City and try to get the Snorlax sleeping on Route 16. Also, in the path between the fences and the trees, you’ll find a way that leads you to a lady’s house, where you’ll get the HM02 Fly. After that, go through the Cycling Road as normal.
You’ll not find any other interesting thing on Route 12 neither beside another Snorlax, in case you didn’t catch the first one. Route 14 and 15 are pretty straightforward too.
Fuchsia City and the Safari Zone
Fuchsia City doesn’t have any kind of novelty. So the first thing you need to do here is beating Koga, which will wait for you with two Koffings (Level 37), a Muk (Level 39), and a Weezing (Level 43). After doing that, it’s time to go to the Safari Zone. Besides catching all the new Pokémon, we have to get an important item here; some gold teeth; you’ll see them as a Poké Ball on the West side of the Safari.
Back in Fuchsia, visit the Safari Zone Warden, which is in his house on the right side of the Poké Center. He will thank you for giving back his teeth. He will reward you with Strength and Surf. With those HMs, we can get to see (and catch) Rayquaza, Kyogre, and Groudon; you can do it right now or let it for the post-game.
After being in Fuchsia, you can get to Route 10. Here’s the Power Plant where you can get Zapdos. Our next task is to get to Cinnabar Island; for it, you can take two different paths, or getting back to Pallet Town and using Surf there, or taking the South way in Fuchsia. Both paths had interesting things.
The Pallet Town path will let you get to the only place to find a wild Bulbasaur (Route 21), while the other path will lead you to a Shinyzer on the coast (Route 19). To activate it, you’ll have to use a Rod. The exact spot is the only space looking to the water and is next to a rock wall.
But if you take Route 19, you’ll get to the Seafoam Islands, where Articuno is waiting for you.
Cinnabar Island
There aren’t new things here, so you have to proceed as usual; the Gym is closed, so you have to look for the key in the Pokémon Mansion. Here’s the only place where you can find a wild Charmander.
After getting the key, it’s time to beat Blaine. His team has a Growlithe (Level 42), a Ponyta (Level 40), Arcanine (Level 47), and Rapidash (Level 41). After the battle, you’ll meet Bill again, and he will take you to Sevii Islands; you can get there before the Post-Game!
Sevii Islands
One Island
You will arrive at One Island, where the only interesting thing to do is getting to Treasure Beach. Next, go to the docks, which will take you to Two Island. Here, you won’t do much either; the only thing to do here is getting a quest of saving a little girl that will take you to Three Island.
Three Island is full of bikers, but you have a task to do, and they are blocking your way. Get rid of them and continue. Next, you’ll see the Bond Bridge. Then, it’s time to get to the Berry Forest and find the girl.
This quest is pretty simple to do, and it won’t take you much. This deviation distracted us from the objective of getting all the Gym Badges; you only need one more. Time to fly to Viridian City!
Viridian City
Giovanni is waiting for us with Dugtrio (Level 42), Rhyhorn (Level 45), Nidoqueen (Level 46), Nidoking (Level 54), and another Rhyhorn (Level 50). Winning the battle will let you get your opportunity in the Pokémon League. In addition, Giovanni will give you the TM Earthquake; we will use this move later for getting a legendary Pokémon.
Pokémon League
There’s nothing new on the Pokémon League; it is the same challenge as before. However, if you explore 4-Points Isle shortly after getting Strength and Surf, you can get Raquaza, Kyogre, and Groudon to use them on the League, making it easy. Victory Road didn’t suffer any changes either.
The Elite Four is composed of the following trainers:
- Lorelei: Ice-type trainer with Dewgong, Lapras, Cloyster, Slowbro, and Jynx
- Bruno: Fighting-type trainer with Hitmonchan, Hitmonlee, two Onixes, and Machamp
- Agatha: Ghost-type trainer with two Gengars, Arbok, Golbat, and Haunter
- Lance: Dragon-type trainer with Gyarados, two Dragonair’s, Aerodactyl, and Dragonite.
Lastly, your rival will be the champion; he has Pidgeot, Rhydon, and Alakazam, and the rest of his team will vary depending on what did you choose as your starter:
- If Bulbasaur: Arcanine, Gyarados, and Charizard.
- If Squirtle: Exeggcutor, Arcanine, and Venusaur.
- If Charmander: Exeggcutor, Arcanine, and Blastoise.
- If you caught your starter: the same as Bulbasaur.
After winning the League, you’ll appear in your house in Pallet Town. The Post-Game is now available, and it will let you catch all the available legendaries. Then, we will summarize how to get them quickly!
Post-Game and the legendaries
Episode 36 Making Battles in the Sand

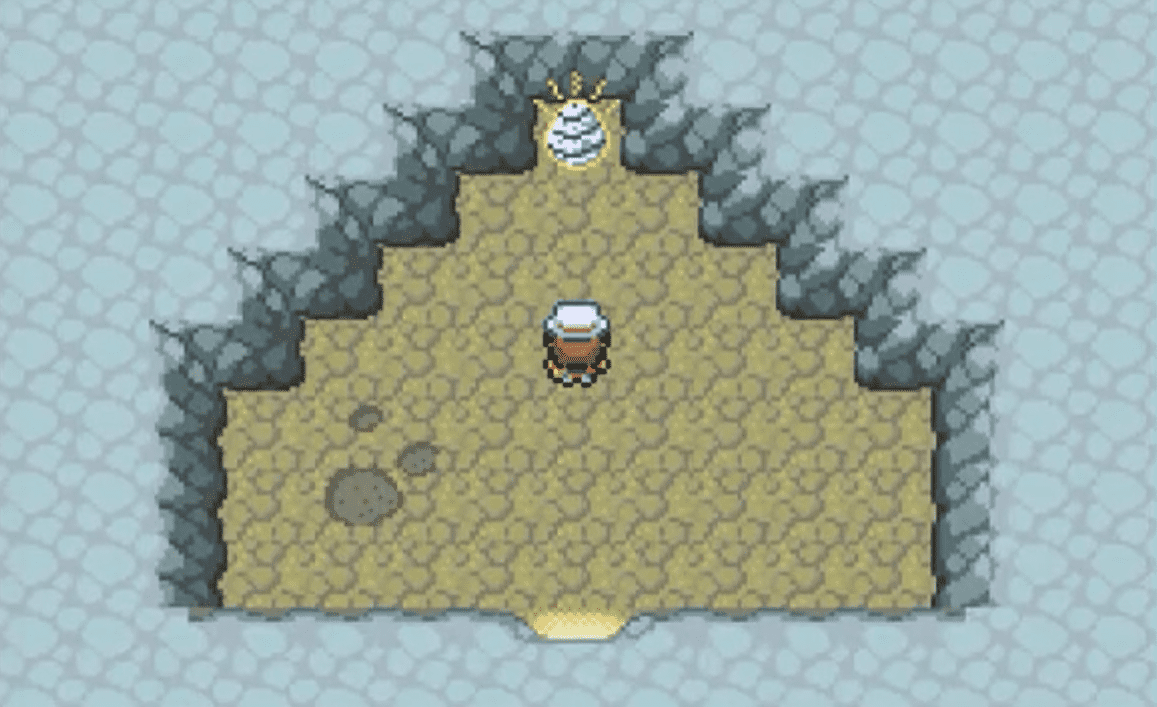
Let’s start with the easiest ones. Getting the trio isn’t a hard quest, basically because Dread Mountain is pretty straightforward. Exploring the cave will lead us to the three legendaries.
There’s no way to deviate from the path to take the A stairs, leading you to the second floor. After that, you can take the B stairs by going down and to the right to get back to the main floor, but now you can explore the cave freely.
Now, you have two options; if you want to get Rayquaza, you’ll have to take the left path to the C stairs. That will lead you to the second floor. Follow the path there to get to the D stairs, and you’ll be back on the main floor. There, take the E stairs, and you’ll be on the top of the Mountain, where Rayquaza rests.

But if you want to get Groudon and Kyogre, you’ll have to take the right path. For catching them, you’ll need Strength and Surf. Also, 1 is the only place where you can get a Bagon; it’ll appear after using Rock Smash.

The F stairs will lead you to a new room that bifurcates into two ways. Going through the right will take you to Kyogre while going to the left path will take you to Groudon. Also, in Kyogre’s path, there’s a woman who will give you two more fossils; Lileep and Anorith.

You can revive all your fossils in the lab near the Mountain.
Jirachi
You don’t have to leave 4-Points Isle yet. Before getting Jirachi, leave an open slot in your party. This time you have to head to Haunted Forest, at the east gate of the town.
Here, you have to head to the north until you get to the Meteor Site. For getting Jirachi, you need to have a Pokémon that has learned Earthquake. Get to the middle of the place and find the spot where a message pops, telling you that you need to use Earthquake to unlock a way through. This lets you get into a cave where an egg (with Jirachi on it) is waiting for you!

Latias and Latios
This is another quest on 4-Points Isle. This time, you have to get back to the Haunted Forest and go to the cabin on the west. Entering there will lead you to the Guardian Meadow, Latias and Latios’s home.

Get on the water with Surf, and explore the inner of the place. Get to the back of the meadow, and you’ll find Latias. After that, leave the place. In your way, Latios will attack you.
From here, the game is pretty much the same as the original; getting to the Mt. Ember, getting Moltres, and exploring the rest of the Sevii Islands by helping Celio getting the Ruby and the Sapphire. But this is a necessary step if you want to get the rest of the legendary Pokémon. So let’s start with the legendary dogs; Raikou, Entei, and Suicune.

Side Note: if you wonder how to catch Unown, all its shapes can be found in the Tanoby Ruins, located in the Seven Islands.
Raikou, Entei, and Suicune
The first two dogs are easy to get; you have to get to the back of the Diglett’s Cave. There, you’ll find:
- Suicune if you chose Bulbasaur or you caught your starter.
- Raikou if you chose Charmander.
- Entei if you chose Squirtle.
After getting the first dog, your next destination will be Rock Tunnel. There, you’ll find:
- Raikou if you chose Bulbasaur or you caught your starter.
- Entei if you chose Charmander.
- Suicune if you chose Squirtle.
The last legendary dog is roaming through Kanto. Good luck finding it!
Ho-Oh, Lugia and Deoxys
To get Ho-Oh, Lugia and Deoxys, you have to head to the PokéMarts on Six and Seven Islands and buy the Aura and Mystic Ticket. Then, they will lead you to Navel Rock, where Ho-Oh and Lugia are waiting for you, or to Birth Island, where Deoxys is looking for a challenge!
Navel Rock is a small place. If you go upstairs, you’ll find Ho-Oh, and if you go downstairs, you’ll find Lugia. Birth Island is a weird place. All you’ll find there is a black triangle. You have to touch it until it gets red, and then Deoxys will appear.
The last Legendary Pokémon left is Mewtwo. It can be found in Cerulean Cave, its usual place. After getting Mewtwo, you can proudly say the game is over, and you caught all the Pokémon available! If there’s a Pokémon you can’t find, the developers did an exhaustive guide of where to find all the Pokémon in the game. You can also check where are the exact spot of the Shinyzers. Take a look at it here:

FAQs
Question: Which Pokémon can you catch in Pokémon Ultra Violet?
Answer: The cool thing about Pokémon Ultra Violet is that you are can have all Pokémon from the first three Gen. Exactly, they are 386 Pokémon.
Question: What’s Special about Pokémon Ultra Violet?
Answer: It is a great game because it lets you catch all the first three Gen Pokémon while messing around the original Fire Red Story; all the new things are added naturally, and you don’t feel like they are forced into the game.
Question: Which starter is the best to start within Pokémon Ultra Violet?
Answer: There’s a great feature about Pokémon Ultra Violet; you can choose a Starter Pokémon from a long list. The best ones here are Dratini, Larvitar, and Trapinch, while the game can be pretty difficult if you choose Gastly as your starter.
Pokemon Ultra Violet Game: Conclusion
Sometimes, as a Pokémon fangame creator, it’s hard to create something original and wait for people to like it. This is why we feel Pokémon Ultra Violet nailed it; the creators took Pokémon Fire Red, and with some little tweaks, they made it into something almost perfect that seems like it is an official game.
We want to recommend this game for those who like to play fangames and are looking for an adventure that focuses on catching and collecting every Pokémon instead of having difficult battles.


